Catapult Project 2015
.
Reflection
How do you feel you incorporated the Design Thinking Methods into the process of this catapult build?
I think that I incorporated the design thinking methods into the catapult build process well. I followed the 4 main design steps in order to create my catapult: Define, Ideate, Prototype,Test and Revise.
The first thing I did with my group was define exactly what we were supposed to be doing. We confirmed that we were going to build a catapult that was capable of launching a baseball.
Next came a more complicated part of the design process, ideating. During this step me, along with my group, made many concept drawings of different types of catapults. I made possible designs for mangonels, trebuchets and ballistas.
After many concept drawings and discussions with the rest of my group members we decided upon a design that we would prototype. Our prototype was a type of mangonel. It had a rectangular base, two triangular walls and a long arm with a cup at the end.
After building this prototype out of old poster board and cardboard we moved on to our next step, test. When we tested our prototype, we found that it did not launch ping pong ball any considerable distance. Simply put it was a bad design. As a result I went back to the drawing board. My group and I discussed what the problem was with our design. After much discussion we realized that the flaw in our design was that there was not enough tension. Our mangonel prototype was dependent on a counterweight to lunch our projectile but what we needed was some sort of elastic. Once we realized that we needed a rubber band based prototype instead of a counter weight based prototype I made another set of concept drawings.
Finally, we decided on one. Our new design was more of a ballista/slingshot. This design had a rectangular base with two poles sticking up at the front of it. 2 elastic bands were attached to the top of the poles at one end and were connected to a bottle at the other end. We were getting short on time, so after making my schematic drawing, my group and I started to build our new design in full scale. We probably should have made another prototype but we were running out of time. We built our design out of wood and PVC poles from the shed as eel as bungee chords at home. We spent a week building it as a group. After we finished building it, we went out to the field and tested our design. We were sure it would work. Unfortunately it did not. When we tried to figure out why it did not work, we realized that there were 3 problems. First, the PVC poles bent backward when we pulled the bungee chords. Second, our bungee chords were unpredictable meaning that they launched at different angles every time. Finally, the bottle we used to launch the baseball acted like a cage meaning that it caught Now we we had vey little time to revise our catapult design. We decided to cut puff the PVC poles and replace them with 2" by 4' pieces of wood. We did this because wood is stiffer than PVC. We then got two more bungee chords and made a sort of pyramid with them that ended in an old towel. This solved two problems. First, adding 2 bungee chords created a more stable and predictable launch and second, replacing the bottle with a small towel allowed the baseball to launch better. This was our final design. It worked much better the our previous designs.
What would you do differently to have a better outcome (design, product, prototype, what have you)?
I think that my group and I did very very well overall. However, the one thing that would have caused a better would have been not using PVC poles. The reason my group decided to use PVC was because of the false assumption that the flexibility of the PVC poles would make our catapult launch a baseball further. Unfortunately, the opposite turned out to be true. If we had known this at the beginning then we would have finished our catapult sooner and we would have had more time to make last minute adjustments that would have improved the distance the catapult could launch the baseball.
How do you feel you were able to work together with your group? What are your strengths and weaknesses in group work?
Our group was functional. Everyone was willing to talk to eachother, discuss and entertain each other's ideas and most importantly help each other. Of course our group was not without problems. We had trouble effectivley involving everyone in the building process. This is because, sometimes it is easier to do something by yourself than try to explain it to other people. As a result, at the beginning of the building process John and I did most of the work because we did not involve DC and Sandra. However, I realized what I was doing and made the effort to involve them in the building process. When I made the effort to involve them they were willing to work and help in any way they could.
How has doing this project impacted how you will work in my class and in others from now and into the future?
This project has helped me to understand how to involve my group-mates in all aspects of the project. From now on, I will make the effort to involve all of my group members in activities from the beginning. Additionally, the building aspect of this project has helped me to understand how to
Evolution of Our Catapult Through the 5 Design Steps
In art class we have been working on the "Catapult project". The goal of this project was to create a working catapult that will launch baseballs. However, before I could start building the final catapult I had to make concept drawings for the first prototype, build that prototype and make schematic drawings of it. After the prototype was built I could start working on revised catapult sketches, make schematic drawings and, ultimately, create the final catapult. I have really enjoyed doing the concept drawings, building the prototype, and starting to build the final catapult.
Step 1: Initial Drawings
Below are the very fist catapult sketches. These were a result of a brainstorm of possible catapult designs. Our group talked about the 3 main types of catapult, trebuchet, ballista and mangonel. We talked about how we could realistically make each kind of catapult and then I drew that design.

Below is the initial sketches for the first catapult prototype:
Step 2 part 1: Prototype
Below is a picture of the first catapult prototype:
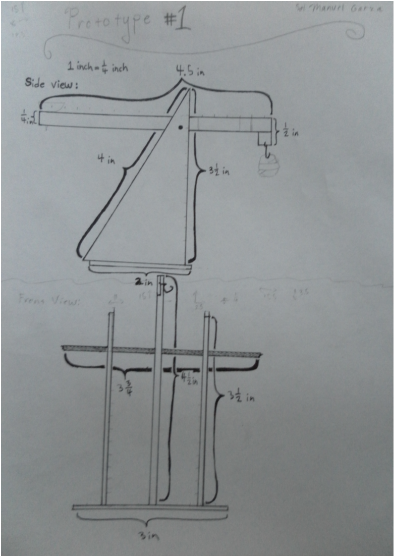
Step 2 part 1: Prototype Drawings
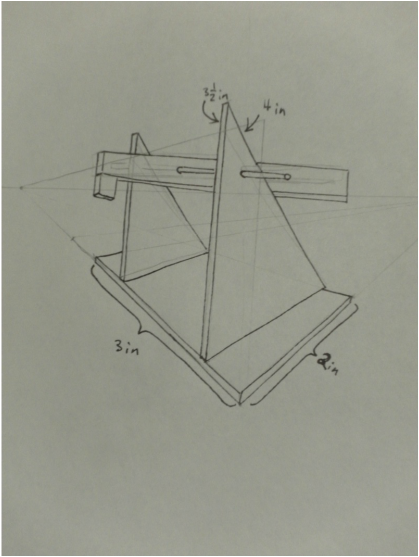
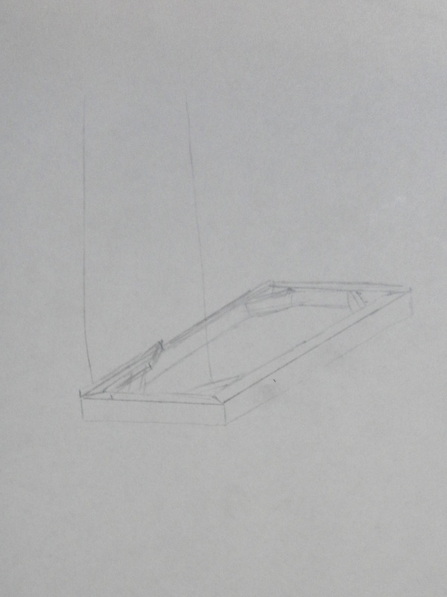
Below are my schematic drawings of the first catapult prototype. The third drawing is a scale 3d drawing of our prototype. I used two vanishing points to make this scale catapult drawing.

Step 3 part 1: Catapult v.1 drawings
After building and testing our prototype, we discovered that our design was not very effective. The prototype did not launch a ping pong ball for more than 6 inches. We calculated that this would translate to about 3-5 feet in a full scale catapult. That was a very low distance. As a result, we decided to totally change our designs. We changed our design from a trebuchet to a ballista/ slingshot hybrid. Our design consisted of a wooden frame, PVC poles, bungee chords and a large soda cup. We stuck the PVC poles into the wooden frame and then attached one end of the Bungee chords to the top of the PVC poles and attached the other side to the large soda bottle. This design was much more effective than the
Our catapult was almost completely made out of recycled materials from the shed. Our frame out of recycled wood and we made our two polls out of recycled PVC pipe. Our frame was 2 ft by 3 ft long and our PVC was 4.5 ft tall
Building the actual catapult was a challenge. . I feel that we worked well together as a group in building it. Everyone was excited about helping build the catapult. If I asked someone to help or do something they were willing to do it. Building the catapult took a little longer than expected because we decided to build a sturdier frame but we still finished it in time. I enjoyed using all of the different saws and equipment.
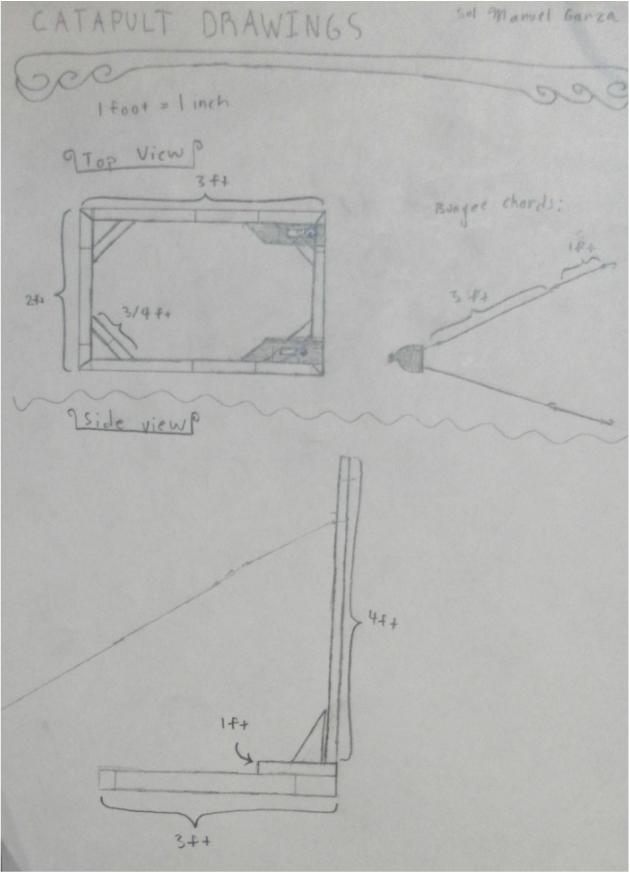
Here are my initial design sketches for our slingshot/ ballista or "Elista":
Our catapult was almost completely made out of recycled materials from the shed. Our frame out of recycled wood and we made our two polls out of recycled PVC pipe. Our frame was 2 ft by 3 ft long and our PVC was 4.5 ft tall
Building the actual catapult was a challenge. . I feel that we worked well together as a group in building it. Everyone was excited about helping build the catapult. If I asked someone to help or do something they were willing to do it. Building the catapult took a little longer than expected because we decided to build a sturdier frame but we still finished it in time. I enjoyed using all of the different saws and equipment.
Here are my initial design sketches for our slingshot/ ballista or "Elista":
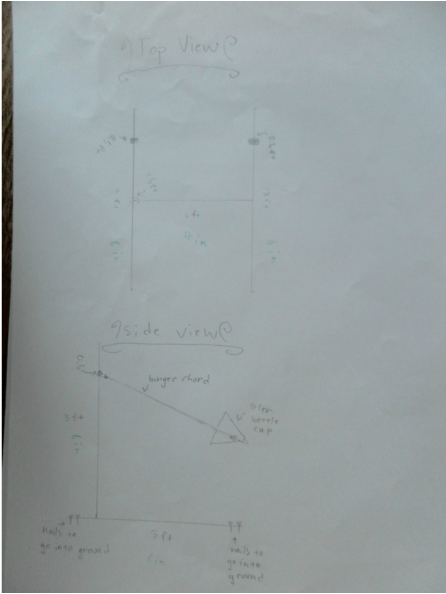
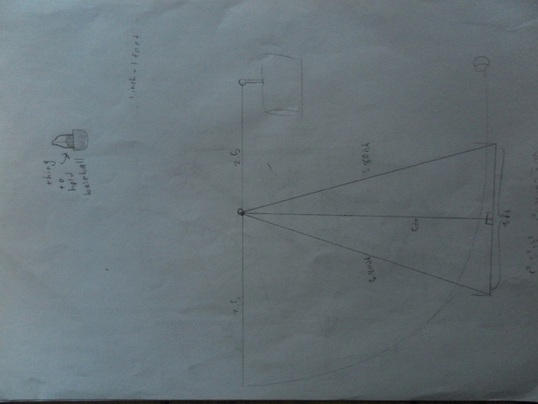
Here are my revised schematic drawings with measurements.
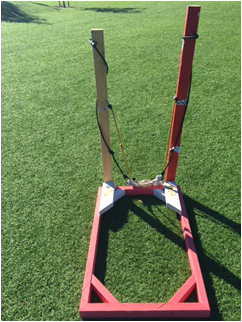
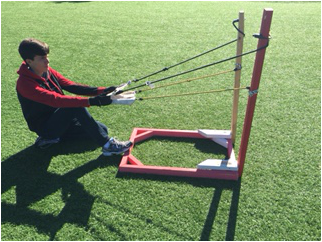
Step 4 part 1: Building the Catapult
After I made all of my catapult drawings I proceeded to actually build the catapult with my group.
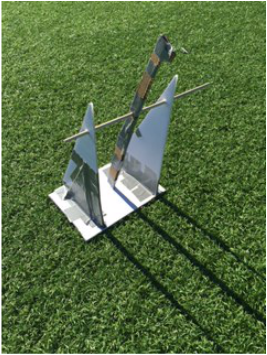
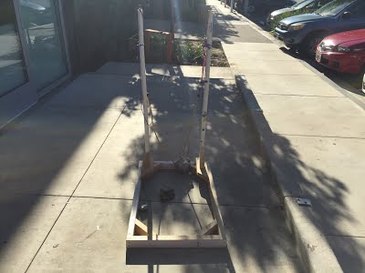
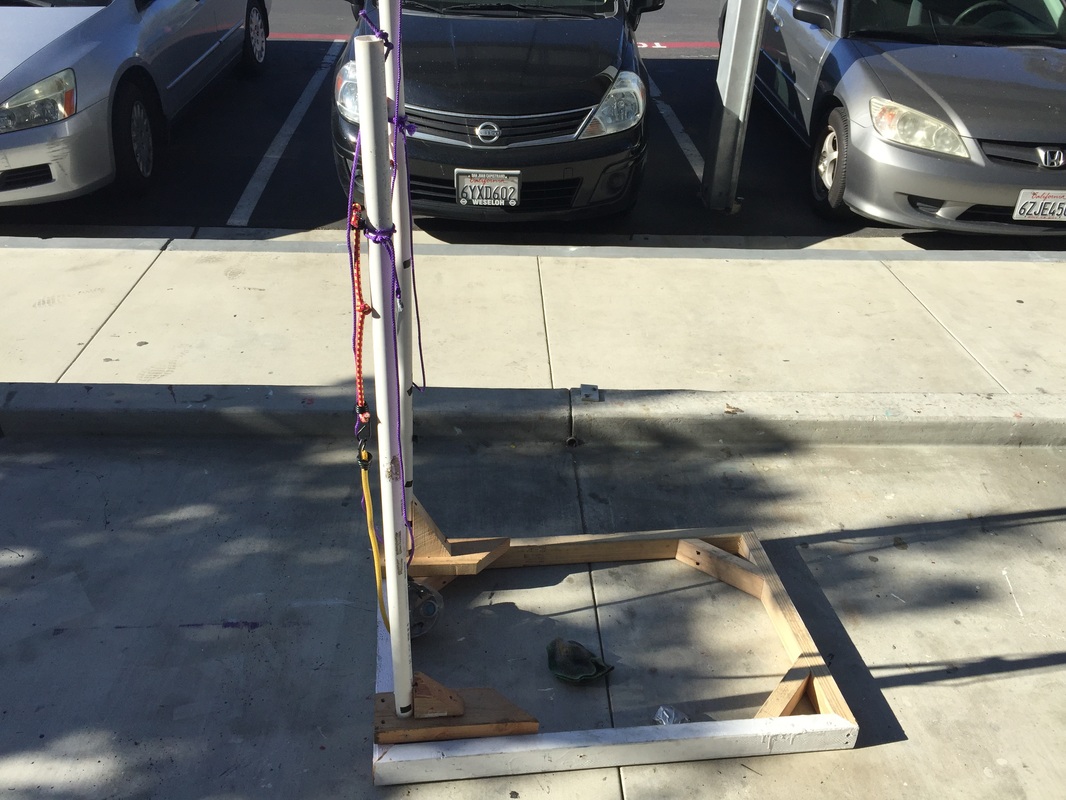
Here is a picture of our catapult: Elista v.1.
Here is a picture of our catapult: Elista v.1.

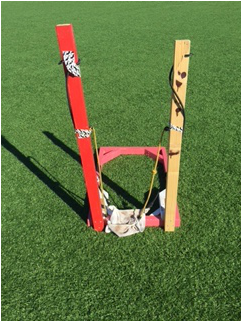
Step 5 part 1: Revising the Catapult
Unfortunately, the Elista v.1 was not very effective. It was a great concept but there was a variety of factors that caused it to be ineffective. We realized that there were 3 problems. First, the PVC poles bent backward when we pulled the bungee chords. Second, our bungee chords were unpredictable meaning that they launched at different angles every time. Finally, the bottle we used to launch the baseball acted like a cage meaning that it caught Now we we had vey little time to revise our catapult design. We decided to cut puff the PVC poles and replace them with 2" by 4' pieces of wood. We did this because wood is stiffer than PVC. We then got two more bungee chords and made a sort of pyramid with them that ended in an old towel. This solved two problems. First, adding 2 bungee chords created a more stable and predictable launch and second, replacing the bottle with a small towel allowed the baseball to launch better. This was our final design. It worked much better the our previous designs.
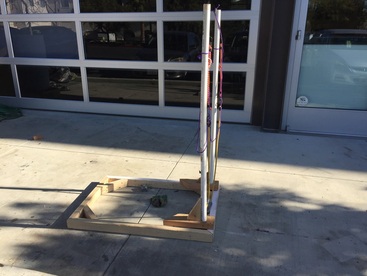
Here are our pictures of our Elista v.2:
Here are our pictures of our Elista v.2: